Part of the reason I like blogging is I like taking pictures--it's fun sometimes to work with others, but I actually enjoy the process of taking my own pictures with a tripod and self-timer/remote. It can seem intimidating at first, but like anything else you get the hang of it once you practice a bit. My biggest trick in sorting things out is to use my purse as a stand-in; I've always got a purse on me for my essentials so it's a ready prop and it also helps me figure out the correct focus by marking and saving the spot where I intend to stand. If you don't have a purse handy you can use some other landmark as a stand-in--it can be the trunk of a tree you intend to stand on (or by) or even just a stick in the patch; for this post I used both my purse and a fence. Props like these work like the "marks" actors have to hit on a stage or red carpet; with a mark you control focus and photo composition. Set your focus to that mark and then make certain your body is where your purse was placed.
When you use this method you are setting the focal distance--it doesn't matter if the item is on the ground or up on a fence--the distance from the camera is what you are determining. As long as you place your body at the correct distance then the focus will work.
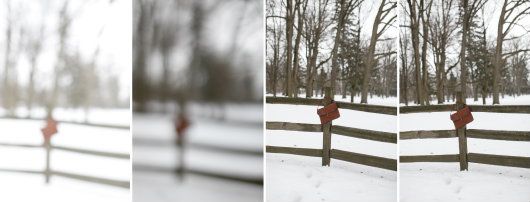
You can see the process above, the run down:When you use this method you are setting the focal distance--it doesn't matter if the item is on the ground or up on a fence--the distance from the camera is what you are determining. As long as you place your body at the correct distance then the focus will work.
-placed my purse a few feet in front of my camera and tripod (this time on a fence)
-work on the settings, I start with ISO and shutter speed then I manually adjust the focus using the purse/fence as my focal point
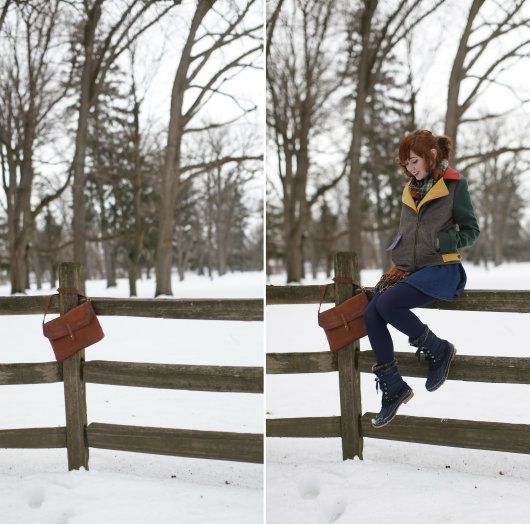
-leave the focus on manual (since you have manually adjusted the focus it will now stay fixed where you left it), push the shutter release button and trot over to your purse
-after your self-timer has taken all the pictures it can (I usually set mine to 6) check the photos you've just taken and make adjustments
-repeat
-move around a little to try another angle/shot and repeat the process:

I always look at the pictures I've taken between every set of self-timer shots and make tiny tweaks here and there in the angles, poses, and camera settings. Even when friends are taking pictures for me I constantly ask them to hand me the camera so I can see how the pictures are going; assessing and adjusting as I go is a huge part of the process. Sometimes the settings are perfect, but you've just realized there's a tree sprouting directly behind your head and other times everything about the photo looks right but you have lipstick on your teeth--the best pictures come from being aware of the problems as you are working and making an effort to fix them.
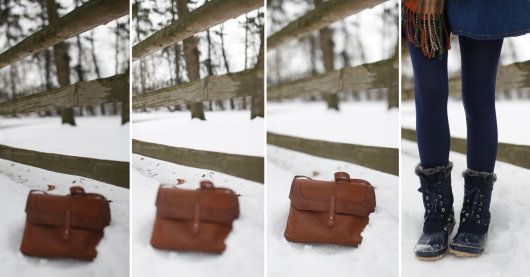
Closer pictures are the same basic idea; if you start with full body shots and move to detail shots you need to lighten your settings. Last week I talked about playing with your settings, so if you have questions about what I mean by lightening your pictures check out the post here.


CONVERSATION